
Madeira Cake is easy, basic, buttery-ish, and great for cake decorating with fondant or sugarpaste because of its sturdy nature. But it’s perfect for dunking too!
Estimated reading time: 5 minutes
Table of contents
It’s one of my favourite plain cakes. I love using Madeira Cakes for celebration cakes because its dense texture makes it easier to handle and it lasts for up to 2 weeks. Not only does it last a long time, its dense texture makes it the perfect cake for decorating with buttercream and fondant (sugar paste).
You’ll find handy hints on baking and cake pan sizes below.
Madeira Cake Tips
As Madeira cakes have a dome shape when baked, you could try scooping out the middle of the batter and leaving a little hole in the middle before placing in the oven. This does help produce a flatter top but I don’t bother.
However, you could try placing a flower nail in the middle of your cake pan. I find that this does reduce the dome dramatically.
To level the cake, once you’ve released it from the cake tin, put a saucer in the cake tin and place the cake on top of it. You could then just slice off the dome using the top of the cake tin as a marker.
How long does Madeira Cake Last?
The cake will easily last a week (even 2) if kept in an airtight container, to stop it drying out. This means that if you are decorating it, you can take a couple of days for complicated ideas! Just remember to use a milk free buttercream icing!
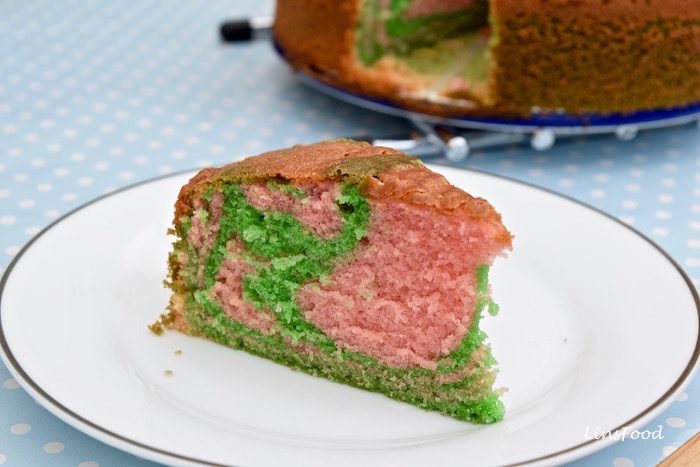
Rainbow Madeira Cake
For a rainbow look when you slice the cake, just divide the batter up into 2 or 3 portions and colour with food colouring of your choice.
My granny used to do this with her butter cakes and we grew up calling them rainbow cakes. I like to do this for girls’ birthday cakes and always get a reaction.
Greasing and Lining Cake Pans
In reply to a question posed by a reader, how to know whether to line or not, as written in my recipe card:
Many cake tins used to need lining. These days though, you have the silicone sort and also non lining types. So if yours is an older style tin, grease, line, grease. The first greasing of the pan is to ensure that the baking paper sticks to the pan. Makes filling the tin with the batter so much easier, as the baking paper won’t be moving around in your tin.
Cake pans that don’t need lining will just require some light greasing. If you have just bought your cake pan, it should have instructions. If in doubt, just grease, line and grease.
Cake Pan Conversions (Scaling Up Cake Recipes)
My cake pans all have a depth of between 3 – 4 inches (about 7.5 – 10 cm). You definitely want to use a cake pan that has a minimum depth of 3″ (7.5 cm), to allow for the rise.
Starting with the recipe below for an 8″ cake, multiply by the corresponding quantity for each size.
4″/10cm – divide by 2.5 bake for about 40 minutes
6″/15cm – divide by 1.5 bake for about 45 – 50 minutes
7″/17cm – divide by 1.25 and bake for about 50 minutes
9″/23cm – x 1 and a quarter (1.25) bake for about 1 hour 10 minutes
10″/25cm – x 1.5 bake for about 1 hour 15 minutes
11″/28cm – x 2 bake for about 1 hour 20 minutes
12″/30cm – x 2.5 bake for about 1 hour 30 minutes
How to use Flower Nails for baking cakes?
For larger cakes, above 10″, I would suggest that you use flower nails when baking your cake. This is a flower nail. The reason for this is so the middle of your madeira cake will bake more evenly. As the metal flower nail heats up, it will conduct heat to the batter in the middle, so the sides don’t bake and brown way before the middle.
I much prefer using flower nails to a heating core.
Flower nails can also help to reduce the dome shape of a cake. Madeira cakes do tend to have dome shapes because of their higher moisture content.
How many you use will depend on the size of the cake. You can use more than one, placed at intervals, if necessary, especially if you are baking a long cake. This is how you do it:
- Grease your flower nails. I hate all specially formulated cake release, and only ever use butter for greasing.
- Place your nails upside down in the cake tin.
- Pour the batter over and bake. Remove the cake nails before slicing/decorating.
- Reduce the baking time by at least 10 – 20 minutes. This will depend on the size of your cake.

What are Cake Baking Strips?
Cake baking strips are insulating strips that are place around a cake pan to stop the edges of the cake from baking too quickly, and therefore browning too much. Cakes with a high liquid content, tend to brown quicker, especially eggless cakes.
So baking strips are perfect for eggless cakes.
If you are baking large cakes, whether madeira cake or not, these baking strips also come in handy, you can use them on their own, or in conjunction with flower nails.
Converting round to square cake pans
Move down in number by 1 inch. For e.g.:
8″ round cake pan = 7″ square cake pan
9″ round cake pan = 8″ square cake pan
Other Cake Pan Shapes
Round cake tins = Petal tins (i.e., same measurements)
8″ round tin = 8″ petal tin
Square cake tins = Hexagonal tins
8″ square cake tin = 8″ hexagonal cake tin
For more design ideas, check out the Cake Decorating Page.
You’ll also find lots of helpful tutorials like how to ice and fill a cake and how to cover a cake with fondant or sugarpaste icing.

Madeira Cake Recipe
Ingredients
- 220 g regular salted butter
- 220 g caster sugar superfine sugar (not powdered/icing)
- 250 g AP flour
- 2 Tbsp evaporated milk
- 4 large eggs
- 1 tsp baking powder
- 1 tsp vanilla paste or extract
Instructions
- Preheat oven to 160˚C (fan 140˚C)/320˚F.
- Line and grease your cake tin as required.
- Sift the flour and baking powder.
- Place the butter and sugar into a deep mixing bowl (tabletop mixer is great) and beat until light and fluffy, about 2-3 minutes.
- Add the milk and vanilla and beat to mix thoroughly.
- Add the eggs, one at a time, adding a tbsp of flour with each one and beat for a minute, until well incorporated, before adding the next one. The flour will stop your batter from curdling.
- Add the flour and mix on the lowest speed until just combined. Don’t over mix.
- Pour the cake batter into the prepared tin. I like to lift the tin and firmly tap the base on a firm surface, to level and pop a few bubbles.
- Bake for 1 hour. Insert a skewer in the middle of the cake, if it comes out clean, it’s done.
- Let cool before taking out.
Hi, I need to make a 12 X 10 inch Madeira cake, 3 and 1/2 to 4 inches deep. I wondered if you could please advise on quantities and baking time please. Thank you.
Hi Mags. Let me know if you need the measurements in metric.
Quantities:
Butter – 1 lb 4oz
Sugar – 1 lb 4oz
Flour – 1 lb 6oz
Milk – 6 Tbsp
Eggs – 12
Baking powder – 3 Tbsp
Vanilla – 3 Tbsp
Bake for about 1 hour 30 minutes but check for done-ness at 1 hour 20 minutes.
Let me know if you have anymore questions.
Thank you so much, yes metric would be handy!
Butter – 570g
Sugar – 570g
Flour – 620g
Milk – 6 Tbsp
Eggs – 12
Baking powder – 3 Tbsp
Vanilla – 3 Tbsp
sorry forgot to say, the cake tin is 3 and a half inches deep.
thanks again
Tin depth is pretty standard, so that won’t affect your “issues”
I have been asked to make a 7″ round lemon madeira cake as the top tier of the wedding cake,, today i had a trial run(normal madeira to give me an idea of size) with 6oz. marg/6oz. sugar/9oz. self raising flour/3 eggs plus milk, i made a major dip in the centre before putting in the oven(baked 50mins) but it came up high(so that would have to be cut off to level it for icing) but just wasn’t big enough for the tin, how much more of the ingredients should i use, including lemon juice?? would i also put in the rind? thanks for you help
Hi Sally,
Are you saying that you’d like a bigger cake for the tin? Is that because of the rise, or just generally?
I notice that you used 9oz flour, that’s too much for 6oz/6oz and 3 eggs.
I would reduce the flour to 8oz but that would not solve your problem of wanting a bigger cake.
I’m not altogether sure of what you are asking, so here are some solutions:
To reduce the rise:
Reduce your oven temp to 150˚C (fan 130)/300˚F.
Leave out the milk, as you have lemon juice as the liquid.
Bigger Cake:
Bake 2 x 7″ cakes and sandwich them.
Lemon
Use the juice of 1 lemon, about 2 tablespoons.
Lemon zest – a matter of choice. It’ll enhance the lemony flavour and aroma. I don’t use the lemon zest because I don’t like “bits” in my cake.
I hope that helps. Let me know if you have anymore questions or if I missed anything.
Hi could you give me the amounts for a 13″ by 8″ number 1 cake tin please
Hi Carmel, shaped cake tin conversions can be a bit tricky, they usually come with a recipe when you buy them.
However, let’s see if we can make it work. 13 x 8 has about the same volume as a square cake tin measuring 10″ each side.
A 10″ square pan will take the same recipe as an 11″ round.
Looking at the conversion chart above, we multiply the ingredients by 2, so double up on all your quantities and bake for about 1 hour 20 minutes, until the sides are coming away or a cake tester inserted in the middle comes out clean. I would check the middle of the cake at the 1 hour 10 minute mark, given its irregular shape.
I hope that helps.
Worked perfectly thank you
You might be hearing from me again soon as I will be making a number 2 cake in February ,
Fingers crossed
And thank you so much for your help and advice it’s truly invaluable.
Carmel
I am so glad to hear that, nothing like a satisfied customer! Thank you for letting me know. Goodness me, the baby’s turning 2 already! Time flies. My youngest is hitting double digit in Feb.
Hi Aslin,
Yes it is now our darling Granddaughters 2nd birthday , and as your recipe and quantities worked so perfectly last time would you mind working this one out for me too ?
I have a number 2 silicone mould size
25.5 x 19.5 x5.5 cm.
Also if I wanted to add a lemon or orange flavour to the mix when ,how and how much please ..
Your forever grateful Carmel..x
Hi Carmel, I would use the same quantities as last year, that is double the whole recipe up. But I can see that your cake tin isn’t very high. Remember to leave space for the rise, so don’t fill up more than 2/3 of the depth. You will most likely have excess batter. Be sure to have cupcake cases and a muffin tin ready and use any excess batter to make cupcakes.
Oh, I forgot, for the citrus flavour: leave out the vanilla and use 2 tablespoons of juice, add it when you would the vanilla. You could also grate the lemon or orange zest for added flavour.
For future baking fun: if you shop online, do a search for panettone aroma, and get a bottle. A couple of drops of it just transforms cakes, you don’t have to use it for panettone alone.
Can I use the same quantity for a nine inch tin as an 8inch if so do I reduce the cooking time ?
Hi there, ideally, with cakes, we advise keeping toe the size of the tin required for the recipe. While you could technically do what you suggested, the resulting texture may not be quite the same and you most certainly will be getting a smaller cake in terms of height, which might make sandwiching difficult. But if you do want to do that, yes, reduce cooking time by 10 minutes, although all ovens are different.
Here is the conversion for a 9″ cake (all ingredients multiplied by 1.25):
220 g = 275 g (9 3/4 oz)
250 g = 312 g (11 oz)
5 eggs
1 tsp = 1 1/4 tsp
I hope that helps. Let me know if you have any more questions.
Thank you for adjusting the ingredients for a 9inch cake. Have just made it and although l haven’t tasted it I have to say it’s risen well and looks and smells great ! I shall be using fondant icing so will I need to put jam underneath the icing as well as cutting it in half to put a little butter icing in between ? Sorry for all the questions ! Regards Margaret
Hi Margaret, yes you’ll need to do all that. Just above the recipe card, you’ll see the links to how to fill and ice the cake. All the links are also on the Cake Decorating page, which is on the Menu, top of the page. Good luck! I hope you’re having fun!
Hi not too sure if my last comment got posted, I’ll just try again. Im currently at the very first stages of baking and im keen to learn. I understand I have to use a 20cm round tin (diameter I presume) however I’m not too sure about the depth of the tin? I have noticed many recipies do not state what depth tin to use, or am I reading instructions wrong? Please help 🙂
Hi Nadine! Thanks for your email, did get your other one too. You are looking at a tin that has a minimum depth of 3″ or about 7.5 cm. 4″ (10 cm) is even better. It’s definitely a lapse on our parts, not mentioning the depth, I’ll go add that to my post now.
Yes 20 cm (or 8″) is the diameter. Many baking tins are still being sold in inches, hence the reason I use both measurements.
I hope that helps, anymore questions, just ask. And you can also reach me at [email protected]
Thank you 🙂 Do the ingredient quantities remain the same if you vary the depth between 3inches or 4inches? Or is the depth of the tin just to give the cake chance to rise efficiently. Also… do cooking times vary x
Sorry I’m taking a while to get back to you today, have had a big catering job.
The depth of the time won’t affect the cooking times or the recipe. It’s the diameter of the cake pan that will determine the recipe and the cooking times.
If i am using a 9″ tin with a depth of 2″ how long do i bake for?
Hi Stephanie, I would check it at the one hour mark, with a cake tester/skewer. If not done, give it another 10 minutes.
Hello,
My son requires a gluten free diet. Have you ever made the Madeira cake with any gluten free flour mixes? Thank you very much,
Hi Teresa, yes. I have a handful of clients who are gluten free and have tried a few mixes over the past and they have all turned out fine, in texture and flavour. I just used the flour mix in place of the wheat flour in this recipe. Result was pretty food, in terms of flavour and texture, but the final cake was a “shorter” cake, in terms of height. So if you are planning to sandwich it with cream and jam, I would bake 2.
These flour mixes also tend to have their own recipes on the back which might be good to follow, as each mix is different.
Is this more like a traditional “pound cake”…dense, short(as in lots of butter: one half pound), rich (from 4 eggs) and moist? And it is cooked in a single 8″ diam x 3” deep pan, correct?
Madeira cake is very similar to the pound cake in texture and density, yes. The pound cake started off as a cake that has a pound of everything (ie butter, flour, etc), hence its name, while the Madeira cake seems to have been a derivation of that. First known recipe was by Eliza Acton in the mid 19th century.
Hi, please could you give me ingredient amounts for a 12 in round Madeira cake please?
Here you go:
550 g regular salted butter
550 g caster sugar superfine sugar (not powdered/icing)
625 g AP flour
5 Tbsp evaporated milk
10 large eggs
2.5 tsp baking powder
2.5 tsp vanilla paste or extract
Bake it for 1 1/2 hours. You will ideally want a a flower nail or two as it’s a very wide cake.
Check your cake at the 1 hour 20 minute mark.
What sort of baking time for a 12″ round cake?
Hi Catherine, thanks for your question. For a 12″ cake, I would leave it in for 1 hour 30 minutes. At this point, it’s safe to check without ruining the cake. Use the usual methods, cake skewer or see if the sides are coming away from the edges.
Thank you Azlin. Just saw that it was already in the instructions. Sorry! Catherine
Not a problem at all, always happy to hear from folks who are using my recipes! x
What do you mean, “Line and grease your cake tin as required” ?? How do I know what is required?
Hi Alan, many cake tins used to need lining. These days though, you have the silicone sort and also non lining types. So if yours is an older style tin, grease, line, grease. The first greasing of the pan is to ensure that the baking paper sticks to the pan.
Cake pans that don’t need lining will just require some light greasing. If you have just bought your cake pan, it should have instructions. If in doubt, just line and grease.
I hope that helps.
Hi Azlin
When using the nail does the cook time need to be reduced? Ive just made a 10”round 1 1/2 recipe and had to take it out at 1hr10mins. Still a little overdone. Could I just double it and keep the time at 1hr15? Also, can I replace the vanilla with fresh lemon juice? Would it be the same quantity? Thank for you time.
Hi there, using a nail will cut down on the cooking time slightly. You could double the recipe and use the same size can pan, but make sure that you have enough height on the pan. Or, you could use the same amount and check your recipe at the 55 min mark.